Welcome to the Ultimate Kedarkantha Trek Guide! If you're planning a trek to Kedarkantha, one of the most popular trekking destinations in Uttarakhand, India, this guide is here to provide you with all the information you need.
This blog post will take you on a journey through the Kedarkantha trek, starting from Delhi and ending at the summit of the trek, Kedarkantha peak. We will provide you with all the information you need to know before embarking on this trek, including how to reach Sankri Village, what to pack, and how to prepare for the trek.
About Kedarkantha
Kedarkantha is a popular trekking destination located in the Indian state of Uttarakhand, in the western Himalayas. It is known for its stunning views of the surrounding mountain ranges and its diverse natural beauty, including forests, meadows, and glacial lakes. The trek starts from the village of Sankri, at an altitude of 6,500 feet, and ends at the summit of Kedarkantha peak, which stands at an altitude of 12,500 feet.
The Kedarkantha trek is considered a moderate trek, suitable for both beginners and experienced trekkers. The trail is well-marked and well-maintained, and there are several campsites along the way where trekkers can rest and spend the night. The trek takes anywhere from 4-5 days to complete, depending on your pace and the route you take.
One of the highlights of the Kedarkantha trek is the stunning panoramic views of the Himalayan ranges, including the majestic peaks of Bandarpunch and Swargarohini. The trek also offers an opportunity to experience the local culture and customs of the mountain communities, who have lived in the region for generations.
 |
| Kedarkantha Peak with snow-covered Himalayan ranges |
Best time to plan Kedarkantha Trek?
The best time to plan a Kedarkantha trek is from December to April, during the winter and early spring months. During this time, the weather is clear and sunny, making it the ideal time to take in the stunning views of the surrounding mountains.
The snow-covered trail also adds an extra layer of beauty to the trek. However, it's important to keep in mind that the temperature can drop significantly at higher altitudes, so it's important to pack warm clothing.
In the summer months, from May to June, the weather is warm and pleasant, but the trail can be wet and slippery. It's also the monsoon season in the region, so you may encounter heavy rainfall during your trek.
July to September is considered the monsoon season, and it's not recommended to trek during this time as the trail can be slippery and the weather can be unpredictable.
In conclusion, the best time to plan a Kedarkantha trek is from December to April, when the weather is clear and sunny and the trail is covered in snow. However, it's important to keep in mind that the temperature can drop significantly at higher altitudes, so be prepared with warm clothing.
 |
| Kedarkantha Summit in December month without snowfall |
How to prepare for Kedarkantha Trek?
Preparation is key to having a successful and enjoyable Kedarkantha trek. Here are some steps to help you prepare for your journey:
Physical fitness: The Kedarkantha trek is considered a moderate trek, but it still requires a certain level of physical fitness. Start by incorporating regular exercise into your routine, such as running, hiking, or cycling, to build up your stamina and endurance.
Gear: Make sure you have the right gear for the trek, including warm clothing, a good quality rain jacket, trekking shoes, and a sturdy backpack. You can also rent or purchase gear in Delhi before you embark on the trek.
Health and Safety: Make sure you are up-to-date on any necessary vaccinations, and bring any medications you need for the duration of the trek. It's also a good idea to have a basic first aid kit on hand.
Research and planning: Before you leave for the trek, research the trail, the local weather conditions, and the best time to visit. Plan your route and make arrangements for transportation and accommodation in advance.
Mentally prepare yourself: The Kedarkantha trek can be physically and mentally challenging, so it's important to be prepared for the challenges you may face along the way. Focus on building a positive attitude and a strong mindset, and remind yourself of why you're embarking on this journey.
 |
| Essential items require for the Kedarkantha Trek |
How to Reach Sankri Village from Delhi?
There are several ways in which you can reach Sankri village from Delhi, which is the starting point of the Kedarkantha trek. Here are a few options:
By Road: Sankri can be reached by road from Delhi, which is a scenic drive of around 330 km. You can take a private taxi or take a shared taxi from Delhi to reach Sankri. The journey takes around 9-10 hours, depending on road conditions and traffic.
By Train: You can take a train from Delhi to Dehradun, which is the nearest railway station to Sankri. From Dehradun, you can take a taxi or shared taxi to Sankri, which is a drive of around 200 km.
By Flight: The nearest airport to Sankri is Jolly Grant Airport in Dehradun, which is approximately 185 km from Sankri. You can take a flight from Delhi to Dehradun and then take a taxi or shared taxi to Sankri.
In conclusion, there are several ways to reach Sankri village from Delhi, including by road, by train, and by flight. The most convenient option will depend on your personal preferences and budget. Whichever mode of transportation you choose, be sure to plan ahead and make arrangements in advance to ensure a smooth and hassle-free journey.
 |
| We traveled by cab from Delhi to Sankri arranged by a travel company from where we booked our package |
Where to stay in Sankri Village?
We have booked our Kedarkantha trek package from one of the companies, which includes a transfer from Delhi to Sankri, accommodation in Sankri Village, a trekking guide for our complete trek along with food for 4-5 days during the trek.
So we took our accommodation in one of the homestays offered by our trekking company but there are plenty of options if you haven't taken any package or planning to come by yourself.
Homestays: Many local families in Sankri offer homestays, where you can stay with them and experience local life and culture.
Campsites: There are several camping sites in and around Sankri, where you can pitch a tent and enjoy the great outdoors.
Guesthouses: There are also a few guesthouses in Sankri that offer basic accommodation facilities.
Resorts: For a more luxurious stay, a few resorts in the surrounding areas offer comfortable rooms and amenities.
 |
| Our stay in Sankri Village |
What is the Trekking Route/Itinerary from Sankri to Kedarkantha Summit?
The trekking route from Sankri to Kedarkantha summit is as follows:
Day 1: Sankri to Juda ka Talab
The trek starts from the village of Sankri, which is located at an altitude of 6,400 feet. The first day of the trek is a relatively easy one, and you will cover a distance of about 4 km. The trek takes you through a dense forest of pine and oak trees. You will cross a few small streams on the way and reach the campsite of Juda ka Talab. This is a beautiful lake surrounded by mountains, and you will camp here for the night.
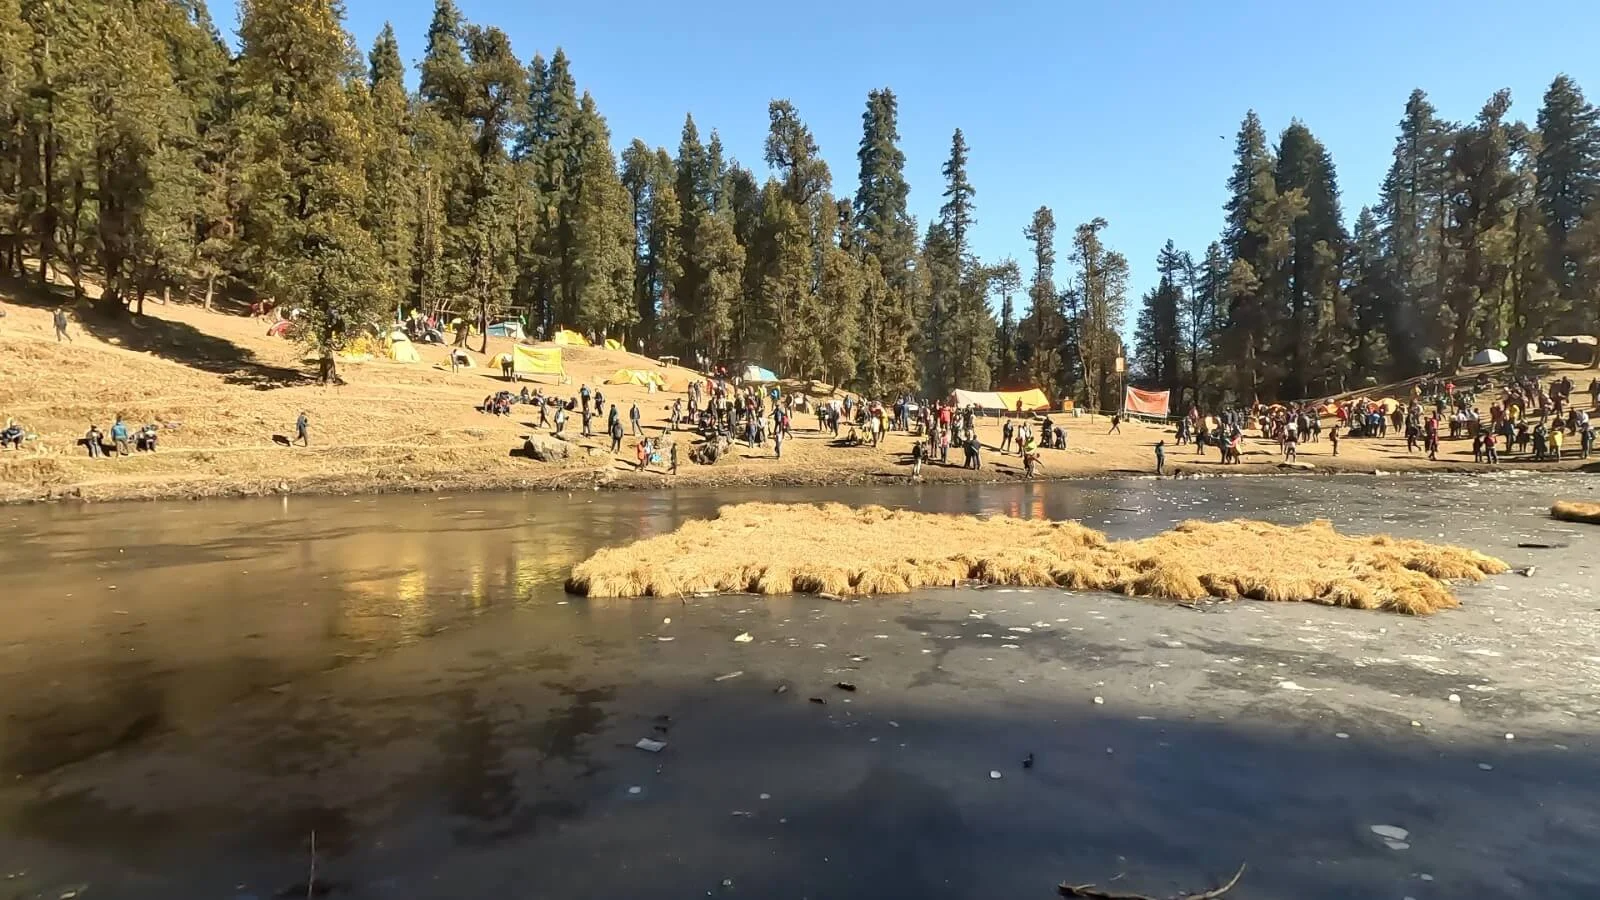 |
| Juda Ka Talab |
Day 2: Juda ka Talab to Kedarkantha base
The second day of the trek is a bit more challenging, and you will cover a distance of about 6 km. The trek takes you through dense forests and steep ascents. You will also cross a few meadows on the way, which offer stunning views of the surrounding mountains. You will reach the base of Kedarkantha in the afternoon and camp here for the night.
 |
| Kedarkantha Base Camp |
Day 3: Kedarkantha base to Kedarkantha summit and back to Juda Ka Talab
The third day of the trek is the most challenging one, and you will cover a distance of about 6 km. You will start the day early in the morning around 2 AM and begin the climb to the summit of Kedarkantha. The climb is steep and takes about 4-5 hours to reach the summit.
The summit offers stunning views of the snow-clad mountains, and you can see spectacular views of the Himalayas and some important peaks like Swargarohini peak, Black peak, and Bandarpoonch Peak from here. You will spend some time at the summit and then start the descent back to the Kedarkantha base camp. From the base, you will continue your descent to Juda Ka Talab, where you will camp for the night.
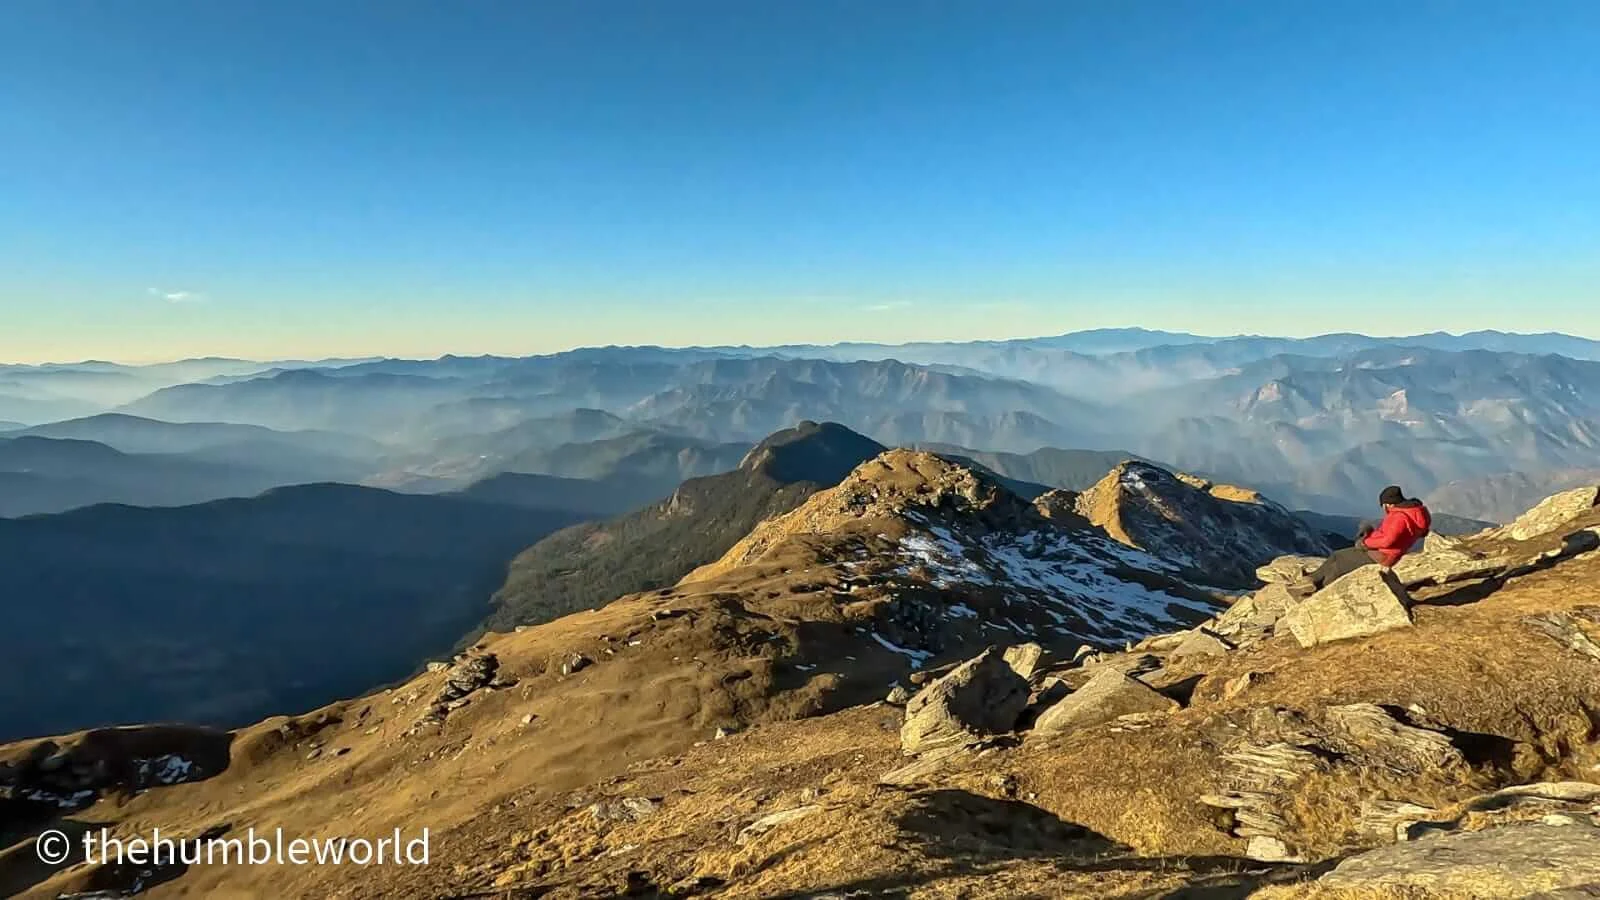 |
| Kedarkantha Summit |
Day 4: Juda Ka Talab to Sankri
The fourth day of the trek is an easy one, and you will cover a distance of about 4 km. You will start the day with a descent through a dense forest of pine and oak trees. You will cross a few small streams on the way and reach the village of Sankri in the afternoon.
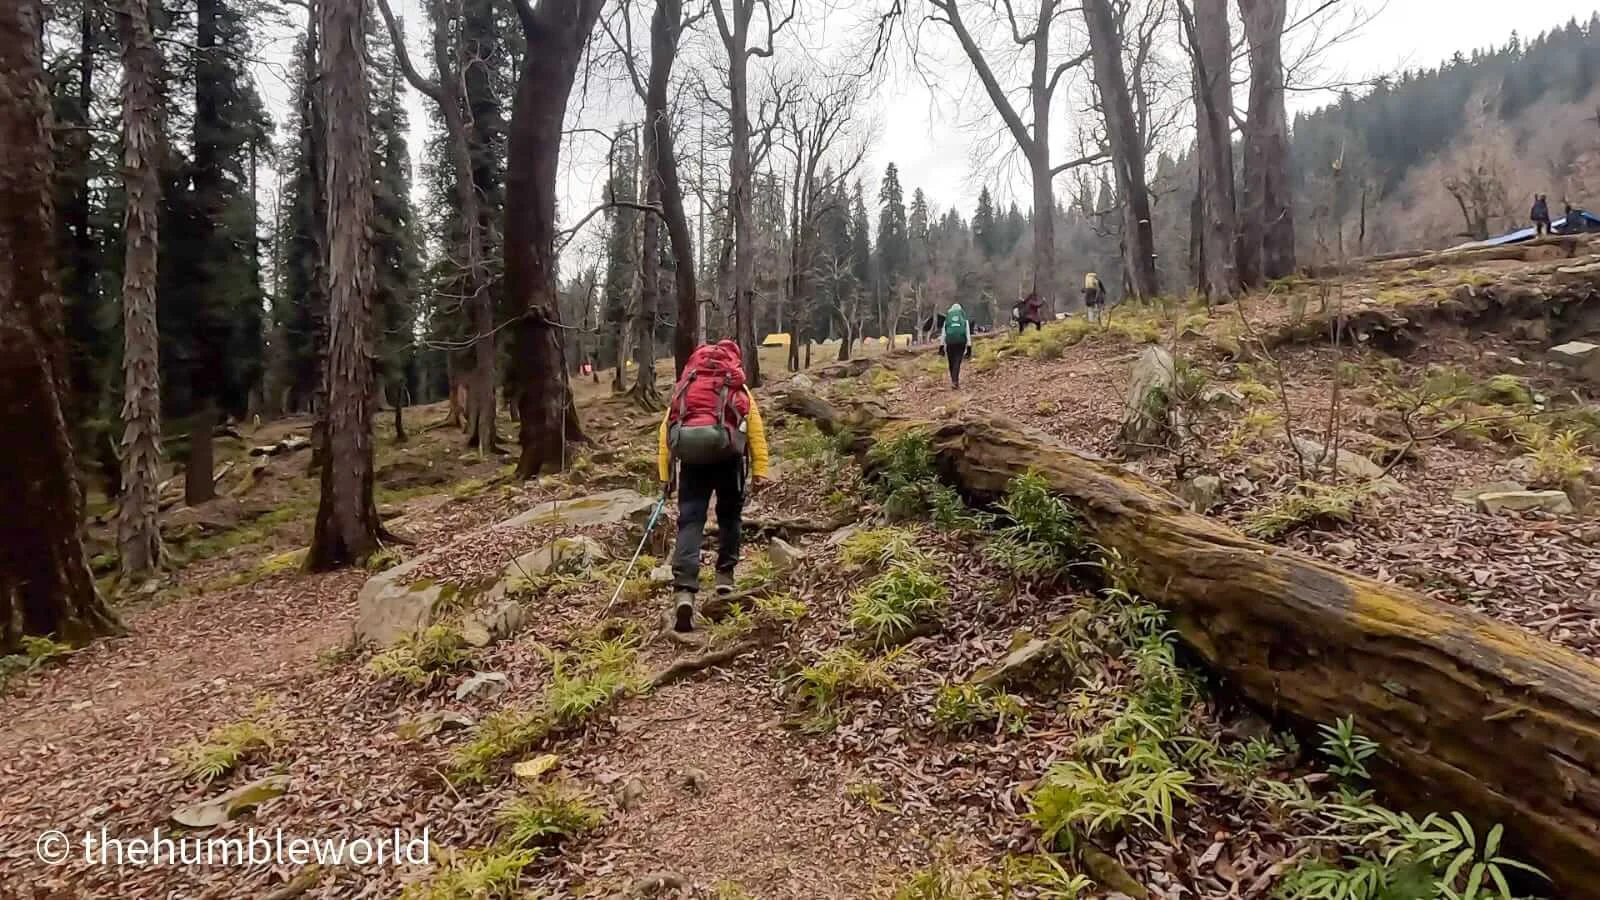 |
| On my way to Juda Ka Talab |
My Kedarkantha Trek Experience
I planned for Kedarkantha Trek after I saw one reel on Instagram which shows the trail full of snow I couldn't resist exploring more about this amazing trek and decided to do it after watching lots of videos on YouTube.
After researching a couple of tour operators who help in covering the complete itinerary, I settled for one with a good package that includes a return journey from Delhi to Sankri, accommodation, a trekking guide, and food for all trekking days all-inclusive.
I planned my trek for the month of December 25-30 in the year 2022 keeping in mind that this is the best month in which we can experience snowfall, I asked a few of my friends to accompany me on this trek and unfortunately, no one was ready to go along with me, but at last moment one of my friend in Delhi agreed to accompany me in the trek.
I traveled from Jaipur to Delhi where I met my Delhi friend and a few other trekkers who also booked their package from the same company. We started our journey from Delhi on 24th Dec late at night and we reached Dehradun early in the morning. Afterward, we changed our vehicle which is again arranged by our tour company to take us to Sankri village.
 |
| We were waiting in Dehradun for our next cab to Sankri |
The distance between Sankri Village from Dehradun is around 200KM and it took us 8 hours to reach Sankri village. After reaching we could literally feel the chills as the temperature is around 1 degree Celsius, we all went to our accommodation which is again covered in our package.
 |
| We took a halt to have tea in Mori Village just before reaching Sankri |
The accommodation is decent with twin sharing and basic amenities, we took some rest and then we had our dinner in the night. before going to sleep our trek guide briefed us about the complete trek journey for the next 4 days and what all trekking gear and equipment we would require during the trek.
The next morning we all are set to start our trek journey, we had our breakfast and those who have not bought their trekking gear, they rented out from the shop in the Sankri which cost under 2000/- INR. We left extra luggage in the clock room at the accommodation itself, so we can trek only with the essential items.
 |
| We are all set to start our trekking journey from Sankri |
So we started our trek journey from Sankri Village around 9 AM in the morning, The initial trail was easy and with the help of our trek guide we reached Juda Ka Talab around 2 PM. After reaching we got our tent which was already been set up by our trek company. So it is our first stop where we will stay for the whole night, we had our lunch and dinner at the campsite only and we made some friends and did some photography.
 |
| On our way to Juda Ka Talab |
In the morning we left for Kedarkantha Base camp which is around 6KM from Juda ka Talab, Now the trail started to become a bit inclined and steep, As there is no snowfall trails clearly visible and we didn't get the chance to use any gaiters and crampons. We reached Kedarkantha base camp in the afternoon and at the base camp, we found a few snow patches with incredible views. Also, the temperature is below 0 degrees and it is recommended to use layering clothes.
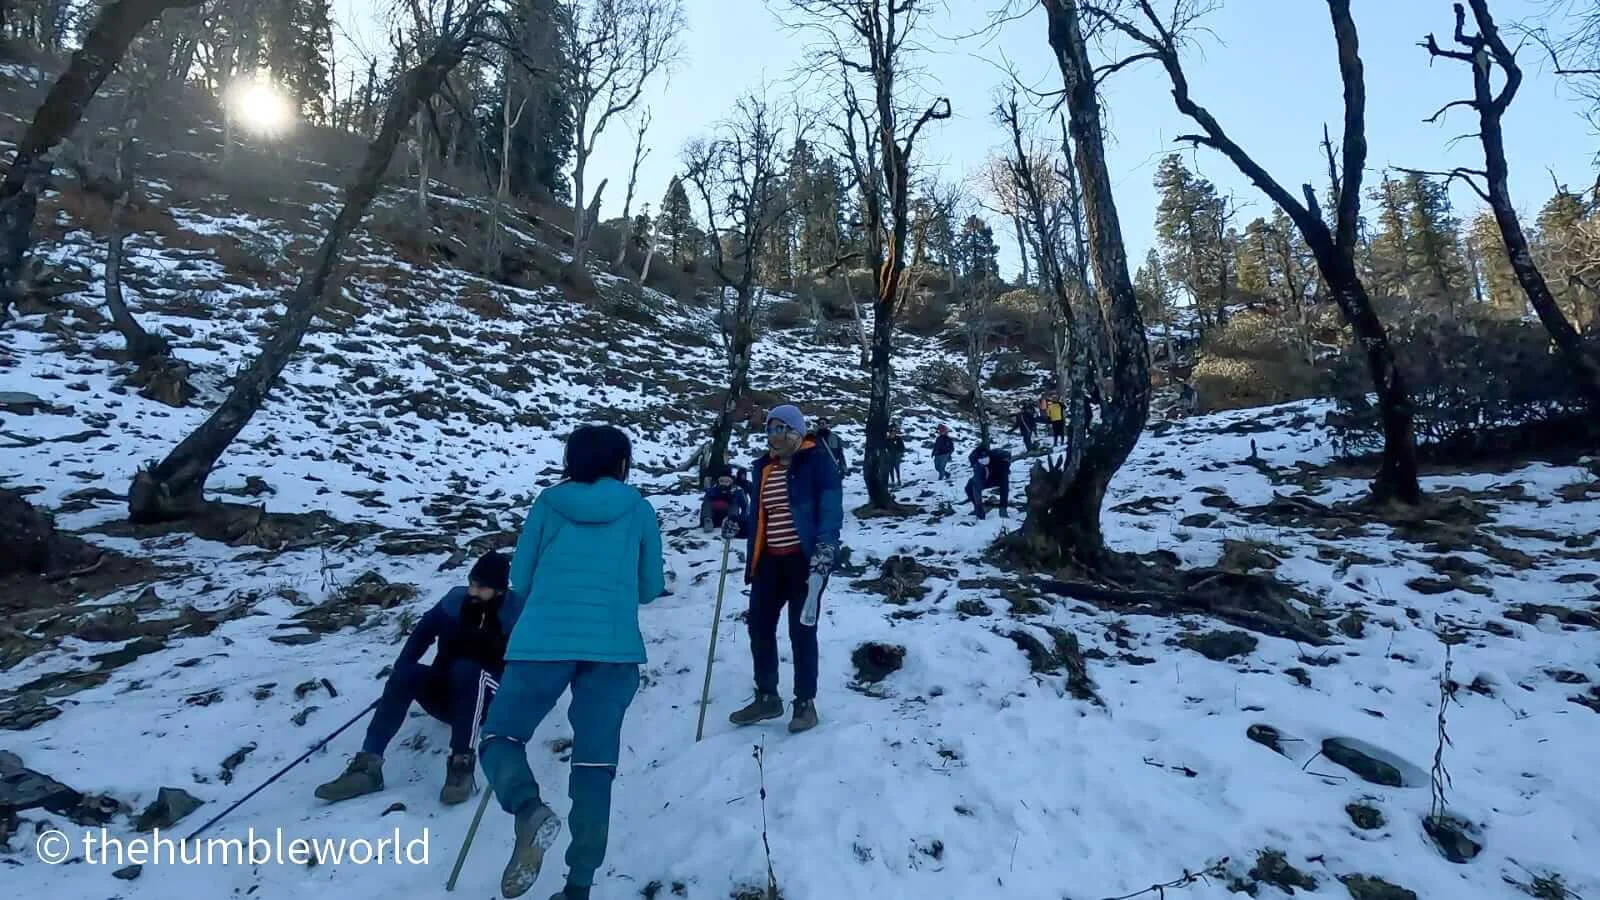 |
| On our way to Kedarkantha Base Camp |
From the base camp, the Kedarkantha peak was clearly visible which is our final trekking point. So we rested for the whole day at Kedarkantha Basecamp and enjoyed the perfect sunset there.
Now comes the final patch of our trek which is the Kedarkantha Summit, for that we need to wake up at around 1 AM in the morning so that we can reach the Kedarkantha Summit early in the morning and witness the sunrise.
We left our heavy-weight baggage in the camp and took a small bag with a water bottle and some snacks in it so it would be easy to climb, we started our trek for the summit around 2:30 AM and it was completely dark, all we can see is the headlamp on all the trekkers.
 |
| We left for Summit from Kedarkantha Base Camp at night |
So we started slowly climbing taking small steps and as we climb more the temperature at the top froze with a temperature close to -10 degrees. We took a halt at one place before reaching the summit to hydrate ourselves with warm water and some snacks, then we continued on our trail.
Now the trek inclination is very sharp and we could feel the pain and started to feel a bit of breathing issue due to lack of oxygen at 12000 feet but still somehow pushing our limits. After 5 hours around 6:30 AM in the morning we reached the Kedarkantha Summit and to be honest that was one the best feeling I have ever experienced.
 |
| Finally, we made it to the Kedarkantha Summit early in the morning |
Watching the morning sunrise from the top heals all our pain and all we could see is the incredible views of the snow-covered Himalayas. I captured the entire summit on my camera and offered prayer to Baba Kedar(God Idol made up of stones at the Kedarkantha Summit). we all celebrated the summit by taking lots of photographs and after spending around half n hour.
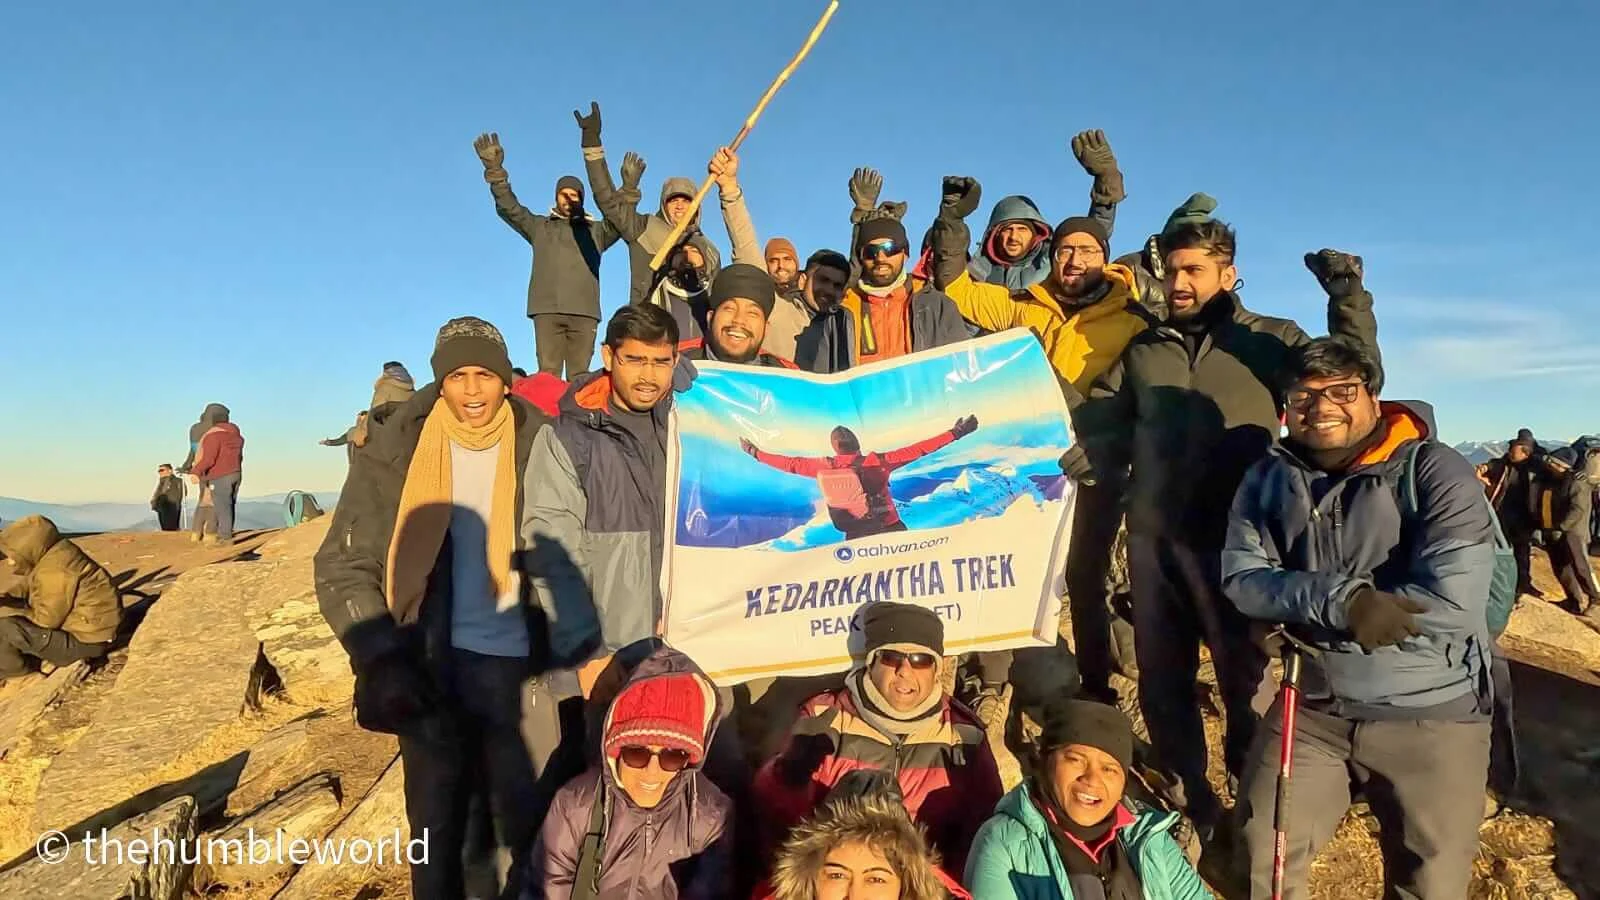 |
| We clicked photographs to celebrate the victory of completing the Kedarkantha Trek |
We started our return journey from the summit and we reached Base camp in the afternoon. we grabbed our baggage and straight away left for Juda ka Talab where we have to take a halt at night.
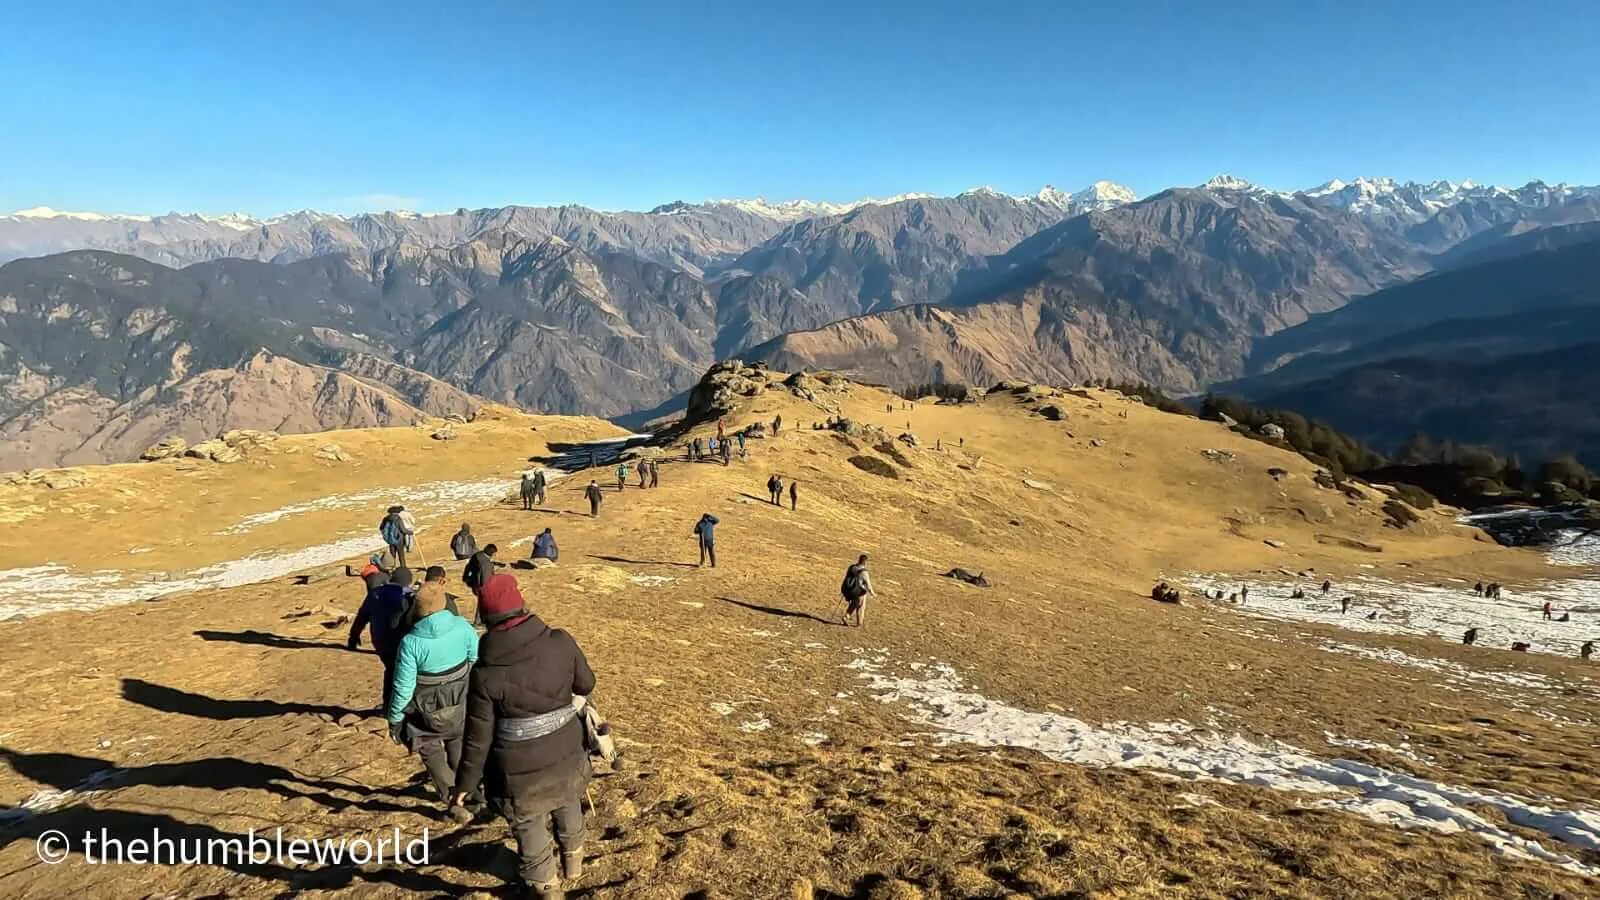 |
| Returning back from Summit towards Sankri |
In the morning we decent to reach Sankri where we collect our remaining baggage from the clock room and left from Snakri for Dehradun.
In conclusion, the Kedarkantha trek is an unforgettable journey through the heart of the Himalayas. With its stunning views, diverse natural beauty, and rich cultural heritage, it's no wonder that this trek has become one of the most sought-after trekking experiences in the region. Whether you're a seasoned trekker or a beginner, the Kedarkantha trek is an adventure that you won't soon forget.
I will cherish this trekking experience for my life.
Important Points to remember while doing the Kedarkantha Trek
Here are some points to remember while doing the Kedarkantha trek:
1. Physical fitness: Kedarkantha trek is a moderate-level trek and requires a certain level of physical fitness. Make sure you do some basic exercises and prepare yourself physically for the trek.
2. Weather conditions: The weather conditions can be unpredictable, especially during the winter months. Make sure you carry proper warm clothes, rain gear, waterproof shoes, and thermal socks.
3. Altitude sickness: Kedarkantha trek involves gaining altitude, which can cause altitude sickness in some people. Make sure you acclimatize well and keep yourself hydrated to avoid altitude sickness.
4. Permits: You need to obtain a permit from the forest department to trek in the Kedarkantha region. Make sure you carry all the necessary documents and permits with you. If you book your trek from any company usually take care of all the permits.
5. Packing essentials: Carry a good-quality backpack, sleeping bag, trekking shoes, trekking pole, sunscreen, sunglasses, and a hat. Also, carry a water bottle, snacks, and a first aid kit.
6. Guides and porters: If you are not an experienced trekker, it is recommended to hire a local guide or a porter who knows the trek route well. It will cost you anything around 1200-1500 INR for the entire trek journey
7. Camera & Batteries: It is recommended to carry a power bank along with you as there is no charging station throughout the trek. As I had a go Pro and DSLR camera I took 2 power banks with 20000 Mah batteries and extra camera batteries. Because in cold weather the camera batteries drain quickly
8. Environment: Kedarkantha trek is a beautiful natural environment, and it is essential to respect and take care of the environment. Do not litter or harm the flora and fauna.
9. Accommodation: There are various camping sites and guest houses on the trek route. It is important to make prior bookings and carry enough cash for any additional expenses.
10. Plan ahead: Plan your itinerary in advance, keeping in mind the weather conditions, your physical fitness level, and any unforeseen circumstances.
I hope you loved reading my Kedarkantha Trek Journey, do share your experience in the comment section would love to read it.
Thank you!


